Skip to main content
Menu
Gallery
Location
Contact
Instagram
Call or Text -
(918) 939-8339
Home
About
Dr. Nicole Castellese
Meet Rebecca Fuller
Practice
Procedures
Non-Surgical Face & Body
ATTIVA® RF
Avéli™ Cellulite Reduction
The Y Lift™
Wrinkle Reduction
Injectables
Dermal Fillers
Hyperdiluted Radiesse®
Laser Treatment
Microneedling
Morpheus8™
Platelet Rich Plasma
StarWalker®
StarFormer®
MiraDry
Body
Arm Lift
Butt Augmentation
Liposuction
Male Plastic Surgery
Tummy Tuck
Body Lift
Labiaplasty
Renuvion®
Face
Brow Lift
Eyelid Lift
Facelift
Fat Transfer
Fractional CO2 Laser Resurfacing
Lip Enhancement/Augmentation
Natural Facial Rejuvenation
Breast
Breast Augmentation
Breast Implant Removal
Breast Lift
Breast Reduction
Breast Revision
Gynecomastia
Photo Gallery
Products
Skincare
Mineral Makeup
Nutritional Supplements
Garments
Patient Resources
Forms & Documents
Financing
Privacy Policy
Testimonials
Specials
Blog
Contact
Call or Text -
(918) 939-8339
Schedule Your Consultation
Y Lift™ Gallery
Y Lift™ Gallery
Back To Galleries
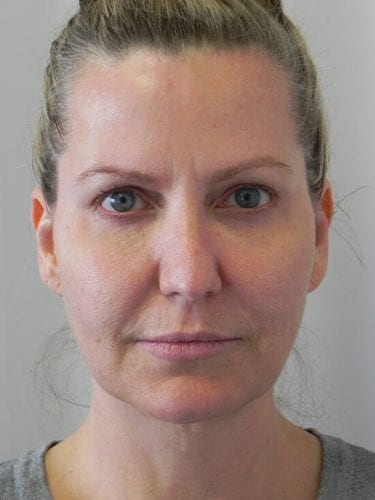
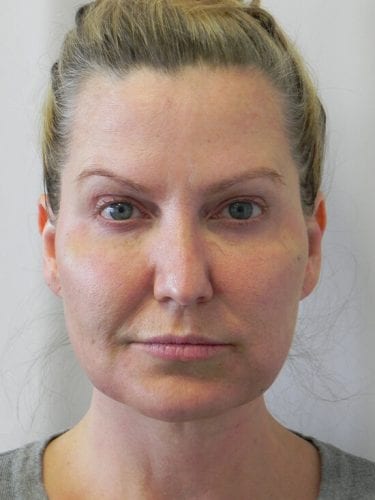
Case #2006
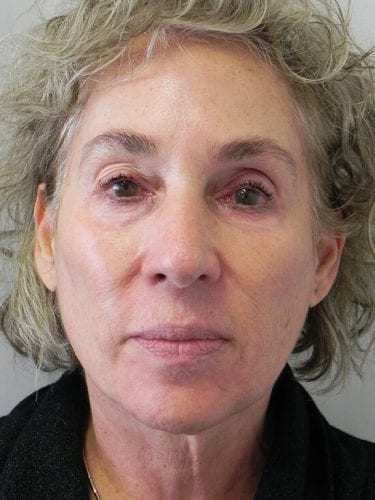
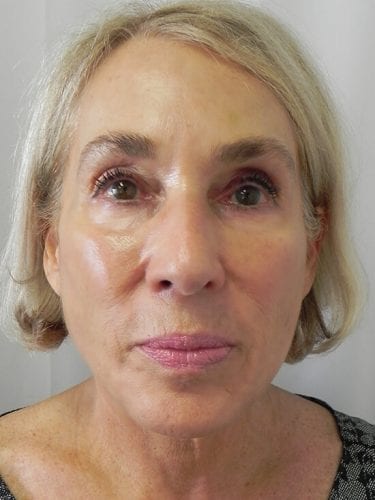
Case #1007
yourbeauty_withdrnicole
DOUBLE BOARD CERTIFIED SURGEON
”𝘠𝘰𝘶𝘳 𝘣𝘦𝘢𝘶𝘵𝘺 𝘪𝘯 𝘵𝘩𝘦 𝘩𝘢𝘯𝘥𝘴 𝘰𝘧 𝘢 𝘸𝘰𝘮𝘢𝘯”
Instagram post 18088127795454351
Instagram post 18413180662198493
Instagram post 18116327440832565
Instagram post 17879486310667485
Load More...
Follow on Instagram